Map Window Environment
The Map Window has the following Toolbars and Task Panes displayed:
- Main Toolbar: The Main Toolbar is always displayed and contains icons for Layers, Information panes and the Enlighten Task Pane.
- Enlighten Toolbar: The Enlighten Toolbar displays icons for selection and navigation options. This toolbar can be switched on/off.
- Advanced Toolbar: The Advanced Toolbar displays icons for more advanced options. This toolbar can be switched on/off.
- Enlighten Task Pane: The Enlighten Task Pane displays quick links for easy navigation and icons for user settings and notifications. This Task Pane can be opened or closed.
- Overview Map: Opens or collapses the Overview Map window.
The Map Window Status Bar at the bottom of the map displays the following information:
- Map Coordinates: The Map Coordinates X;Y of the mouse pointer location.
- Map Scale: The Zoom Scale of the map window. As the user zooms in or out on the map window, the map scale is either increased or decreased.
- Map Window Dimensions: Displays the width and height of the map window in the units set by the GIS administrator.
- Map Units: The Map Units as configured by the GIS administrator in the Site Configuration Settings. The units can be set to Meters, Kilometer, Feet, Miles or US Feet.
- Zoom Scroll Bar: Allows user to Zoom in and out of the map using the zoom slider options or to pan using the arrow options.

Fig: Map Window Environment
Toolbars
The Main Toolbar and enlighten Toolbar are displayed with the large icons by default when a user opens enlighten for the first time. Users can then set to save their Toolbar and Pane display state in the Set User Options pane. The user also has the option to use large or small icons, which is also managed in the Set User Options pane. The Horizontal toolbars do not have descriptive text , however, mouse-over Tooltips display more explanatory descriptions of each icon's function. These tool-tips can be turned ON/OFF by selecting the Show/Hide Tooltips icon on the enlighten toolbar.
When a toolbar icon is selected, the icon changes color to green to indicate the display status is ON and the selected toolbar or pane is displayed. When the icon is deselected it changes back to its' original state where the display status is set of OFF and the selected toolbar or pane is closed.
![]()
Fig: Icon display status ON/OFF
- Buffer
- Custom Query
- Integration
- Layer Profile
- Mail Merge
- Measure
- Network Trace
- Quick Plot
- Shut-Off Report
- Stop Predicates
- Theme Layer
- Layer Profiles
- Manage Reports
Main Toolbar Icons
Enlighten Toolbar Icons
Advanced Toolbar Icons
Context Menu Tools
| |
Load Geo-scan | |
Select Circle | |
| |
Show Info | |
Kml Download | |
| |
Refresh | Options | ||
Main Toolbar
The Main Toolbar is loaded by default when a new enlighten session is opened and appears as a vertical toolbar on the left hand side of the map. When the Main Toolbar icon is selected the icon changes color to green and when it is deselected, it changes back to black. The Main Toolbar has the following icons:
 Open Enlighten Toolbar
The Enlighten Toolbar icon opens the Enlighten Toolbar which appears as a horizontal toolbar at the top of the screen. This toolbar contains tools to search, create and manage selections, map navigational tools, and tools to save bookmarks and do quick plots.
 Open Advanced Toolbar
The Advanced Toolbar icon opens the Advanced Toolbar which first appears as a horizontal toolbar at the bottom of the screen. This toolbar contains tools to conduct a Network Trace, Shutoff Report, Filter Layers, Selections by spatial filters, and links to enCapture and enFact functionality. See the Advanced Toolbars section for more information.
 Show/Hide Toggle Display of Toolbars and Panes
The Toggle Display of Toolbars and Panes is a toggle icon which opens or closes the toolbars and panes according to the state they were set when the user last logged off. When a user opens an enlighten session for the first time, the Main Toolbar and Enlighten Toolbar are displayed by default, and the Show/Hide is not yet set.
The Show/Hide function works hand-in-hand with the Save Toolbar/Pane State on Logout function.
The Hide/Show icon will change according to whether the display is set to Show ![]() or Hide
or Hide ![]() .
.
 Open Show Info pane
The Show Info icon opens the Show Info pane which is dynamically updated based on the selection of objects within the map. If no objects are selected in the map, the Show Info pane will still open, however a warning message saying Nothing Selected is displayed in the tree pane below the Map Layer header.
For more information see the section titled Show Info Pane.
 Open Basic Info pane
The Basic Info icon opens the Selection pane where the object's basic information is read directly from the spatial table. If multiple objects from different map layers are selected, the Selection pane displays a drop-down list in the top left corner where the user can select the required layer and then page through the details per map object selected using the  and
and  arrows. The corresponding object is highlighted on the map as the user pages through the various selections.
The attributes displayed in the Basic Info pane are setup in MapGuide Maestro as part of the individual Layer Properties settings where the check box for the attributes are ticked for display.
See the section on Basic Info Pane for more details.

Fig: Object is highlighted on the map based on selected object in the Selection pane
 Layers List and Control Pane
The Layers List and Control pane is a floating pane which is opened from the Main toolbar and displays on the left-hand side of the screen. This pane shows the list of layer groups and layers available within the map and also acts as a legend by showing how each feature is displayed graphically on the map.
See the section on Layers Controls Pane for more information.
 Add External and Local Layers
The Add External and Local Layers option allows users to set the background map or External Provider on which their own data will be displayed. This option also allows users to add temporary layers from external files (GeoJSON/TopoJSON, KML, GPX and IGC file formats), and remote URL based layers such as WMF or WFS data to view within the map window.
See the section on Add / Manage Layers for more information.
 Enlighten Task Pane
The Enlighten Task Pane icon opens the Enlighten Pane which contains Quick Links and links to the enlighten Help documentation. The Enlighten Task Pane also gives the user access to the following enlighten Base Tools:
 Home
Home-
 Set User Options
  /
/  Redline Notifications (Active/Inactive)
-
 /
/  Check Notifications (Active/Inactive)
 -
 Map Performance Tool
 -
 Admin View
See Base Tools on enlighten Task Pane for more information on the different icon functionality.
 Draw and Manage Redline Markups
The Draw and Manager Redline Markups opens the Manage Redline Objects task pane. See the section Redline Functionality and Processes for more information.
 Help
Help
The Help icon opens the on-line Enlighten User Guide in a separate window where the user can search for the required topic.
 Logoff
When the Logoff icon is selected, the display state of any open toolbars and panes is saved before logging the user out of enlighten and returning them to the enlighten homepage.
Advanced Toolbar
The Advanced Toolbar contains various advanced functionality to conduct network traces, create shut off reports, advanced selection options, and advanced spatial functions.
 Network Trace
The Network Trace tool allows the user to determine which pipes, valves or parcels will be affected if a network is interrupted within the context of water/sewer utilities. Water/Sewer network tracing starts from a selected pipe and traces to find the connected nodes and pipes that would be affected if something were to happen to the selected pipe. See the section on Network Trace for more information.
 Shut off Report
Shut off Reports allow users to create a report for a planned or reactive interruption in services for water or sewer. The report consists of the Job number, type, event date and time, outage duration and the reason for the interruption. See the section on Shut off Report for more information.
 Integrations
The Integrations tool allows third-party applications to be accessed from within enlighten. The form or application that is launched is specific for each integration configured, therefore further details will be provided by your enlighten Administrator. See the section on Integration Tools for more information.
 Layer Filter
The Layer Filter tool is similar to the search functionality in the fact that it uses SQL statements to display only entities within a layer that meet specific criteria. Please note that the layer needs to be within its visible scale range to be filtered on. See the section Layer Filter for more details on functionality.
 Theme Layer
The Theme Layer allows the user to generate a new temporary themed layer which may vary the stylization of features from an existing layer based on their properties or data associated with the features. See the section Theme Layer for more details on functionality. See the section Theme Layer on how to create a temporary themed layer.
 Custom Query Builder
The Custom Query Builder provides a mechanism to filter features on a layer by specifying criteria based on the feature properties. See the section Custom Query Builder for steps to create a custom query.
 Select Radius
The Select Radius command allows the user to create a selection set of objects by selecting a point on the map to use as the center of the circle, and then stretching out the circle to the desired radius to define the extents of the selection set. See the section Select Radius for more details.
 Select Polygon
The Select Polygon allows the user to create a selection set of objects by digitizing a polygon shape on the map to define the extents of the selection set. See the section Select Polygon for more details.
 Select Within
The Select Within allows the user to select features within selected layers. See the section Select Within for more details.
 Buffer
The Buffer tool, located on the Advanced toolbar, allows the user to create a buffer around selected features based on the distance and unit of measure selected. See the section Create a Buffer for more information on how to create a buffer.
 Drill Down Selection
The Drill Down Selection prompts the user to select a point on the map and opens the Show Info pane allowing the user to see all related information for the selected object falling within the point buffer. See the section Drill Down Selection for more information.
 Nearest Neighbours
The Nearest Neighbours allows the user to identify a set number of neighboring objects within a set distance of a selected map feature. See the section Nearest Neighbour for more information.
 Spatial Functions
The Spatial Functions allows the user to identify all map features on a specified layer that are adjacent to one or several selected map features. See the section Spatial Functions for more information.
 Spatial Summary
The Spatial Summary displays a polygon summary and a line summary in the Spatial Summary pane. See the section on Spatial Summary for more information.
 enCapture
enCapture is a tool in enlighten that allows the user to keep records on objects defined by attribute data. See the section on enCapture for more information.
 Register Artifacts
The Geo-locate Artifacts allows the user to geo-locate artifacts and capture their physical location. See the section on Register Artifacts for more information.
 Maintain Artifacts
The Maintain Artifacts allows the user to maintain artifacts in terms of location, associated image and descriptions. See the section on Maintain Artifacts for more information.
Login Information
Once you have typed in your enlighten URL you will be taken to a login page where you will need to enter a username and password. The username and password will be given to you by your enlighten administrator.
You can either login normally by entering username and password, alternatively using the LDAP option. Both scenarios are indicated below
- You will receive a unique username and password.
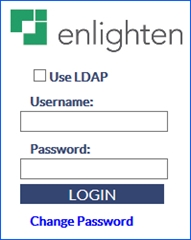
Fig: Unique Sign on Details - Your username and password will match your windows authentication login details. To use this option you will have to tick a checkbox – Use LDAP and enter your windows credentials.

Fig: Enter Windows credentials - If you choose to select the Use LDAP option, the username and password (based on your windows credentials) will automatically get populated
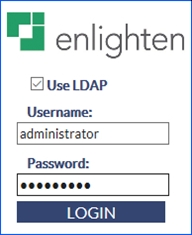
Fig: Single Sign-On, Windows Credentials Automatically Populated - If you enter an incorrect password three times you will be presented with a validation code for verification. If entered successfully you will be directed to the landing page of the map on enlighten.

Fig: Validation Code