enFact
enFact consists of two sections:
The Register Artifacts tool  is designed to organize data including pictures, manuals, and videos etc. The register artifacts tool allows you to associate these files with either an (X, Y) location or spatial feature on the map by using a symbol to mark the map location. Artifacts can have metadata associated with them and be classified into artifact types.
Once an artifact has been registered it can be accessed, edited and deleted using the Maintain Artifacts tool  . You can view all or selected artifacts using this tool and zoom to selected features on the map.
Register Artifacts
To access the enFact Registration process select the Register Artifacts icon  from the main enlighten toolbar. The following screen is then displayed:
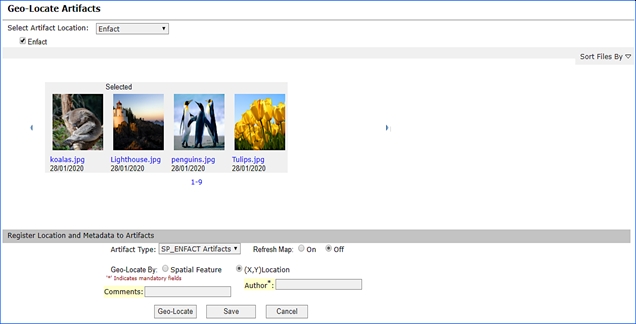
Fig: enFact Registration Page
Select a network directory from the drop-down list. The network directory and its contents will be set up by your enlighten administrator.
Once you have selected a directory from the drop-down list one or multiple check-boxes will be displayed. Select your desired data type described in the checkbox and associated files will be displayed in a ribbon view.
You can view the artifacts by scrolling through the list. In the screenshot above, a superscript of M is displayed for each artifact indicating that the artifact is already registered to a location or feature on the map.
To view a larger version of the artifact in its native browser, click on the file name (blue name). You can select single or multiple artifacts by clicking on the image. Once an image is selected you will see Selected appear on top of the image.
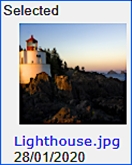
Fig: Selected Artifact
Once you have selected the artifacts to be Geo-located, select an artifact type from the drop-down list.
Artifact types are categories set up by the enlighten administrator in which artifacts can be classified. Select the category that best describes your artifact and more options will become available.
Two means are available for geo-locating data:
- Spatial Feature: Represents a location on the map, for example, a pipe or parcel.
- (X, Y) Map Location: Represents a set of coordinates or a single defined point on the map.
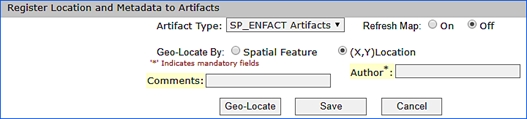
Fig: Metadata for Artifact Type
The next step is to Input the Metadata into the display fields, mandatory fields are denoted by a * next to the name.
You can also select whether you would like the map to refresh automatically or if you would like to control the map refresh.
Metadata for each artifact type is configured by your enlighten administrator. The metadata that is mandatory is denoted by (*). To geo-locate an artifact, the following steps are required:
- Select the Geo-Locate button.
- Go to the enlighten map.
- Select either your (X, Y) location that will be displayed to the left of the metadata or,

Fig: Geo-Locating by (X,Y) Location - If you are selecting by spatial feature you can select one or more spatial features by holding the shift key to select multiple objects on the map.
- Return the register artifacts dialog box.
- Select the Save button.
- If you have selected on for map refresh then symbol will automatically appear in the location chosen, otherwise refresh the map to view your symbol.
 Maintain Artifacts
Maintenance of geo-located artifacts can be performed by clicking on the Maintain Artifacts icon  from the main enlighten toolbar. Alternatively, you can select an artifact symbol on the map and click maintain artifacts to bring up the Maintain Geo-Located Artifacts dialog box.
Select Artifacts by Artifact Type
When no items are selected on the map you can search through your artifacts by image type. When an image type has been selected from the drop-down list, all the objects that have been associated with it are available along the ribbon. You can see which artifact is selected due to a grey background that appears around it.
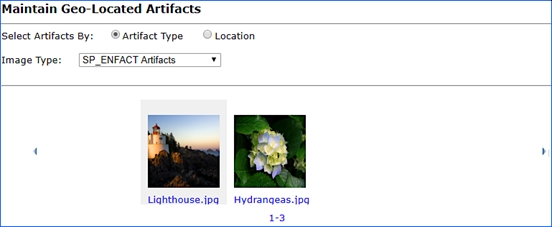
Fig: Maintain Geo-Located Artifacts by Artifact Type
To view more information about an artifact, select it from the ribbon. Two more sections will then appear on the page.
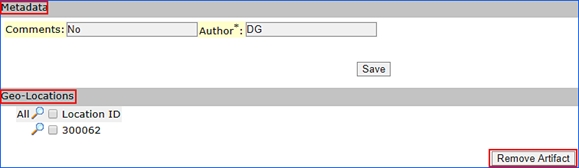
Fig: enFact Maintain Artifacts Dialog Box
- Update Metadata: This screen allows editing of the metadata associated with artifacts. Type over existing metadata, add or delete text and save to update.
- Zoom to One or More Locations: An artifact with multiple locations will be displayed as below. To zoom to all locations on the map click on the magnifying glass with ‘All’ to the right. To view, a specific artifact click on the magnifying glass next to the desired location.
- Remove Artifact from One or More Locations: To remove an artifact from one or more locations select the artifact by ticking the box next to the ‘Location ID’ and clicking on the ‘Remove artifact’ button.
Select Artifacts by Location
Select an artifact on the map and then click on the Maintain Artifacts tool, this will bring up the following screen.
The artifact selected will be shown in the ribbon view along with its associated metadata. All the locations where this artifact is saved will be shown in the Geo-Locations section. The location where the object is selected on the map is represented by an asterisk (*).
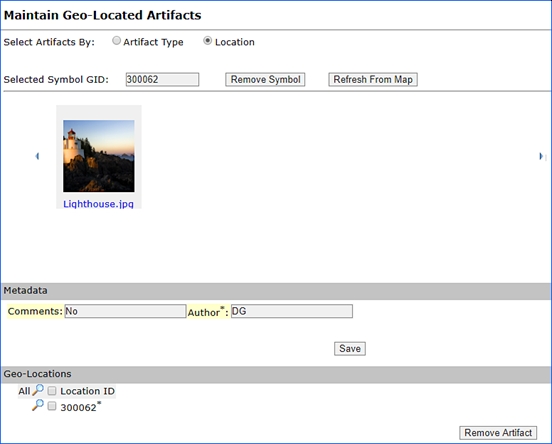
Fig: enFact Maintenance Dialog Box
 Flexible Map Launcher
When the Flexible Map Launcher icon is clicked and activated, a pop-up request is made, and the user would have to allow the pop-up. This would then open the Flexible Map Launcher within a new window, and the user is then provided with an enlighten map, appearing in a pop-up window, displaying a different User Interface and customisable widgets.
The primary purpose of this tool is to enable different maps such as google maps, open street maps and street-view maps within the flexible viewer. The purpose of utilizing this tool, is to allow external users to use the features within enlighten from outside of the company/organization.
It is also a different experience for the user as administrator user can customize the user interface. The user also has many widgets or features available to be used within enlighten which is pre-defined by the Administrator, upon request.
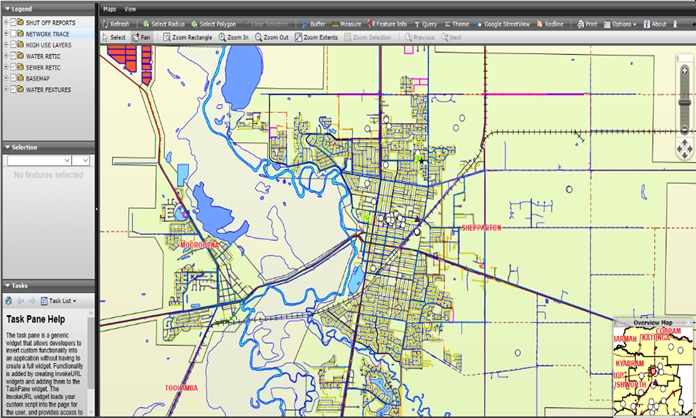
Fig: Flexible Map Launcher
Base Tools

 Scroll Icons Right/Left
This tool allows you to scroll across the toolbar, to the right
![]() or left
or left
![]() to view tool options.
to view tool options.
 Check Notifications
The Check Notifications icon ![]() is a function within enlighten which allows the user logged in of any changes made to their profile. When the enlighten administrator makes changes such as assigning/un-assigning of layers and functions to/from a certain user, the user would receive a flashing Check Notifications icon
is a function within enlighten which allows the user logged in of any changes made to their profile. When the enlighten administrator makes changes such as assigning/un-assigning of layers and functions to/from a certain user, the user would receive a flashing Check Notifications icon ![]() indicating a change has occurred.
indicating a change has occurred.
- If the enlighten administrator is making changes to a particular user, and if that particular user is not logged into enlighten or is not in the Mapview page, then the user would not be notified (through the Check Notifications feature) of the changes just made.
Once the enlighten administrator is done making changes to a particular user’s profile, the user (who is logged into enlighten, and on the Mapview page) will see a red exclamation mark on the check notifications icon. The user will then have two options:
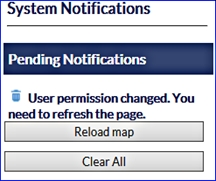
Fig: System Notifications - Reload Map: This would Reload the Map, so the user can see the new layers/functions assigned by the enlighten administrator.
- Clear All: This would Clear the notification hence removing it from the Check Notifications section.
 Map Performance Tool
To start Map Performance testing the following steps can be followed:
- In enlighten Map View select the Map Performance Tool in the toolbar.
- Log in with the OSPerformance user details.
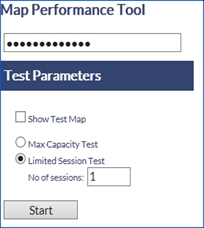
Fig: Map Performance Tool - Define the Map Performance Tool:
- Show Test Map: Display a section of the main map. Each Map Performance Test consists of automatically running a set number of zooming and panning tasks on the main map.
- Max Capacity Test: Will activate map sessions continuously until the capacity of the enlighten Map Server is reached.
Note: That this test will cause the eventual failure of the Map Server. Refreshing the browser will halt the function. - Limited Session Test: Allows the User to nominate the number of sessions to be activated during the test run. This option will allow the user to undertake consecutive test runs with a varying number of sessions during each run.
- No of sessions: The number of consecutive tests to run when selecting a Limited Session Test.
The progress of the test runs, and the test performance details are displayed under the Performance Test Status area.
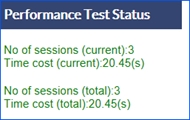
Fig: Performance Test Status area
 Home
Home
The Home tool  takes the side pane on the right-hand side of your screen back to the home menu, giving you access to help options. The user has access to the application documentation by selecting the following documentation hyperlinks:
- enlighten user guide
- enCapture user guide
- What’s new
- Map view help
- Browser configuration guide
- Support
Selecting the Support link opens the Support dialog box where a support issue can be logged. This issue is sent to the internal support email as configured by the Administrator. If any Quick Links have been defined by the Administrator, these quick links will be displayed in the Welcome task pane. When the user clicks on a Quick link hyperlink, the map will zoom to the extents of the zoom window defined by the Administrator.
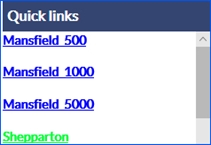
Fig: Quick link examples
 Set User Options
The Set User Options allows the user to customize their settings for enlighten from a user interface standpoint to saving specific map administrative settings and login credentials.
The Set User Options allows the user the option to make the following changes:
- Save location/scale on logout
- Save layer profile on logout
- Restore Last Map
- Save layer filters
- Save Active Report
- Use Large Icons
- Floating Task and Information Pane
- Use Default Select
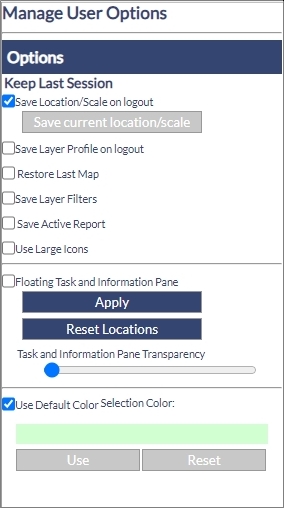
Fig: Manage User Options
Save Location/Scale on Logout
The Save location/scale on logout option allows the user to easily save the current location and scale of the map when the user logs out of enlighten. This is a feature which makes it convenient for the user to be directed to that specific point at logon, saving time in the process.
Save Layer Profile on Logout
This option within the Manage User Options pane, allows the user to save the current/applied layer profile when the user logs out of enlighten. Hence when the user logs back into enlighten, the layer profile which was saved on logout will be activated.
This is the same function as the Save on Logout function found within the Layer Profiles function.
Restore Last Map
When the Restore Last Map checkbox is ticked then the last map will be restored, when the site is reloaded by pressing F5. If the Reload Default Map button is pressed, then the default map will be restored.
If the user turns on the Save Layer Profile on Logout option, then this layer profile settings will be maintained when the user logs out and back into enlighten. If the Save Layer Profile on Logout option is turned on, and then the user turns on the Restore Last Map option then the initial Save Layer Profile on Logout option will be disabled.
Save Layer Filters
The save layer filters allows the user to save the current filter on a specific layer, when logging out and thereafter logging into enlighten. If this option is not ticked then when the user logs out of enlighten then the layer filter would automatically cleared.
The Save Layer Filters option under the Manage Users Options is the same function as the option found within the Layer Filters functionality.
Save Active Report
Save Active Report enables the user to view the last secondary advanced form which was viewed, from within the detail view, as opposed to returning the primary form by default. This feature is beneficial when the user is concerned with a specific secondary form, and in some instances where there are multiple secondary forms it would save the user time and effort.
Use Large Icons
This feature alters the user interface of the icons displayed as it makes the icons much larger for viewing purposes. This can very effective and useful when using a browser on a tablet or phone as the display would be larger and easier to view. This option is also available for users with impaired vision or poor eyesight.
Floating Task and Information Pane
This feature makes the task and information panes float which then allows the user to move it around to a convenient point on the map. It also allows more of the map to be shown, as this floating panes can be moved around as per the users convenience. The floating pane can also be set as transparent to avoid it from blocking other objects/features on the map.
In doing so the user has the option to alter the transparency level of the floating panes and assign a colour for features currently selected on the map. Both functions are customisable to ensure a user-friendly interface is maintained. If a transparency is applied, then this will also influence the selections on the map and will be displayed accordingly. This feature is useful for the end users, especially when buildings are required to be displayed within parcels or any features to be displayed without being blocked by a selection.
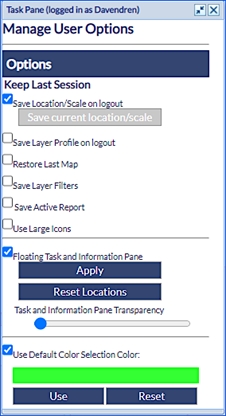
Fig: Manage User Options
Floating task panes are disabled for mobile/tablet users, hence the option to apply this feature is removed.
Use Default Colour Selection Colour
When this option is ticked then the user’s specified selection colour is ignored, and overwritten with the Default Selection colour. This can be useful for instances when the user wishes to revert back to a standardized selection to maintain consistency.
For users who wish to customize the selection colour the the users should:
- Click on the Selection Colour bar.
A Colour Picker dialog should then be displayed, where the user can then pick a colour
- Click on a desired colour to select it for map selections.
- Applying the change by clicking on the OK button.
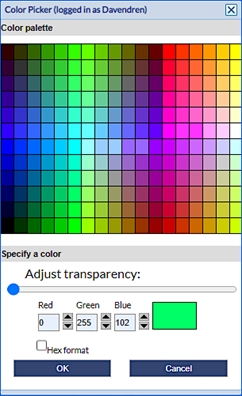
Fig: Colour Picker dialog
 Admin View
The Admin View tool ![]() takes you directly into the administrator screen. Please see the administrators guide.
takes you directly into the administrator screen. Please see the administrators guide.
 Log out
The Log Out tool ![]() is used to end a session and sign you out of enlighten. Taking you back to the enlighten home page.
is used to end a session and sign you out of enlighten. Taking you back to the enlighten home page.
 Hide Task Pane
The Hide Task Pane tool ![]() allows you to expand or collapse the working pane on the right of the screen.
allows you to expand or collapse the working pane on the right of the screen.
The Context Menu
The context menu can be accessed by right-clicking within the map view. The menu gives access to different commands for navigating around the map, retrieving information on map objects or modifying map properties.
The commands most commonly found in the context menu are described in the following list of commands.
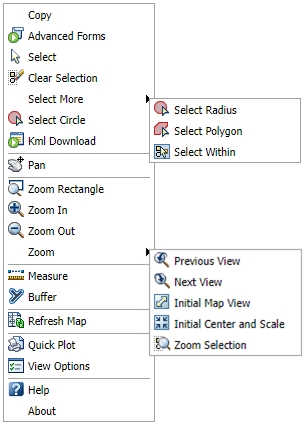
Fig: Context Menu Options
Copy
This function allows the user to copy the current map view, which is stored temporarily in the clipboard and can then be pasted into a DWF viewer.
 Advanced Forms
This function allows the user to access the Advanced Form function within the context menu of Enlighten. Objects should be selected first, then the user should right click on the map which will bring up the context menu. From there the user can select the Advanced Forms function.
 Load Geo-scan
The Load Geo-scan command loads the scanned image as a back-drop on the layer Geo Scan Images for the selected Geo-scan boundary. See the section Geo-scan Images for more information.
 Select
The Select command allows selecting single or multiple objects from the map window either by clicking on the object or by drawing a window around it. Multiple objects can be selected by holding the shift key. To remove an object from a multiple selection, hold the shift key and click on the object.
Once an object, or series of objects are selected in the map, the selection set is highlighted in the map. The attributes of the same selected objects are displayed below the Layers legend in the Properties section in the left pane. These Properties display the Spatial Table attributes for a single record in the selection set where the user can navigate between Spatial Tables and Record Number within the selection set by selecting the the Spatial Table name from the drop-down list, and the record number in the number drop-down list.
To view the attributes from the spatial table for a single record in the selection set, do the following:
- Select objects in the map using any of the selection methods on the Context Menu or by using the Select icon.
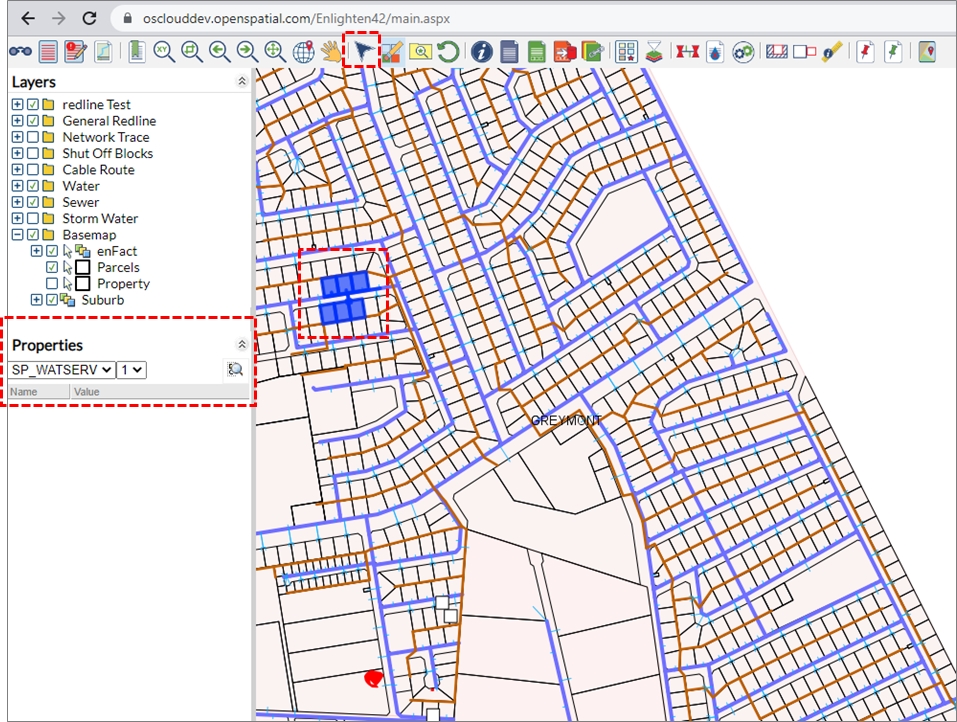
Fig: Selection of Objects in the map updates the Properties section - In the Properties section on the left hand side, the Spatial table drop-down list only displays the names of the spatial tables for the objects in the selection set. Select one of the table names, for example, SP_PARCEL.
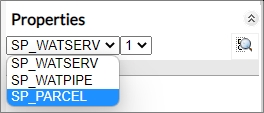
Fig: Selection Spatial Table name from drop down list - The number of records per spatial table is based on the current selection set. The user can step through the records to display the attributes per object in the spatial table by selecting the record number in the drop-down list.

Fig: Step through attributes per selected record for each spatial table.
 Clear Selection
The Clear Selection command is used to clear all selected features on the map.
 Select Circle
When using the Select Circle option, the user is required to draw a circle around the objects of interest and the value of the circle's radius is displayed on the right-hand side task pane. The units of measurement can also be selected via the Measure units drop-down button to display the radius as the user drags the cursor across the map. The list of Measure units is as follows:
- Miles
- Kilometers
- USFeet
- Feet
- Meters
- Centimeters
- Millimeters
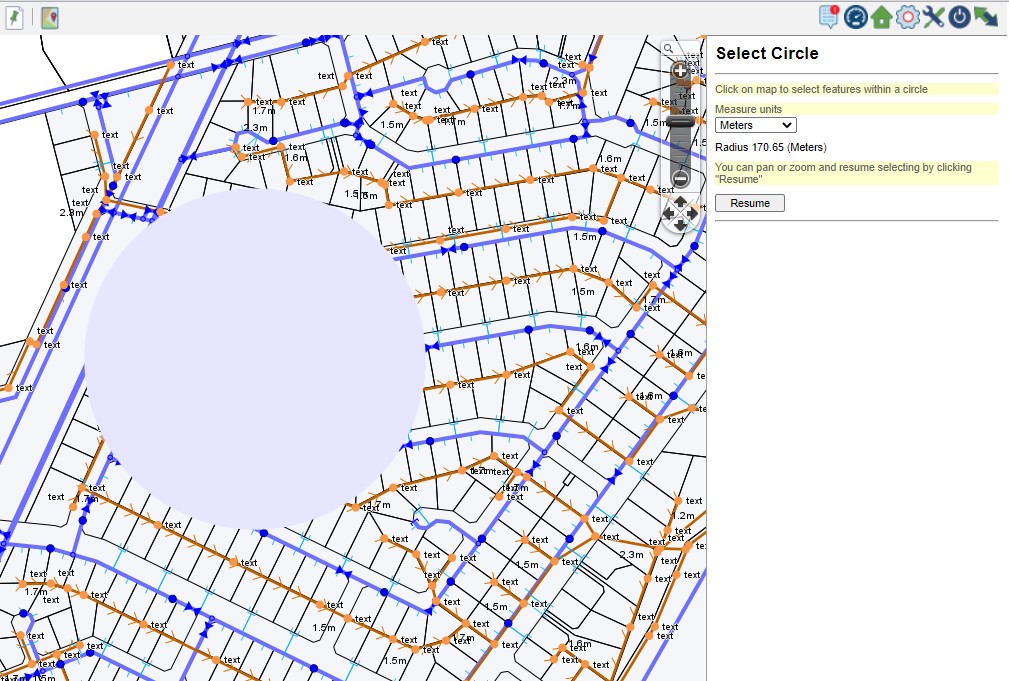
Fig: Context Menu Select Radius
Select More
The Select More option presents more selection options:
 Select Radius/Select Polygon
The Select command allows the user to perform a spatial selection using the cursor. The Circle, Radius and Polygon commands require the user to draw either a circle or polygon with their cursor on the map to select features that are within or touch this user-defined circumference or polygon.
When using the Select Polygon option, the user is required to draw a polygon around the objects of interest by selecting a series of points on the map. The user is prompted to complete the polygon holding down the CTRL key and click to end.
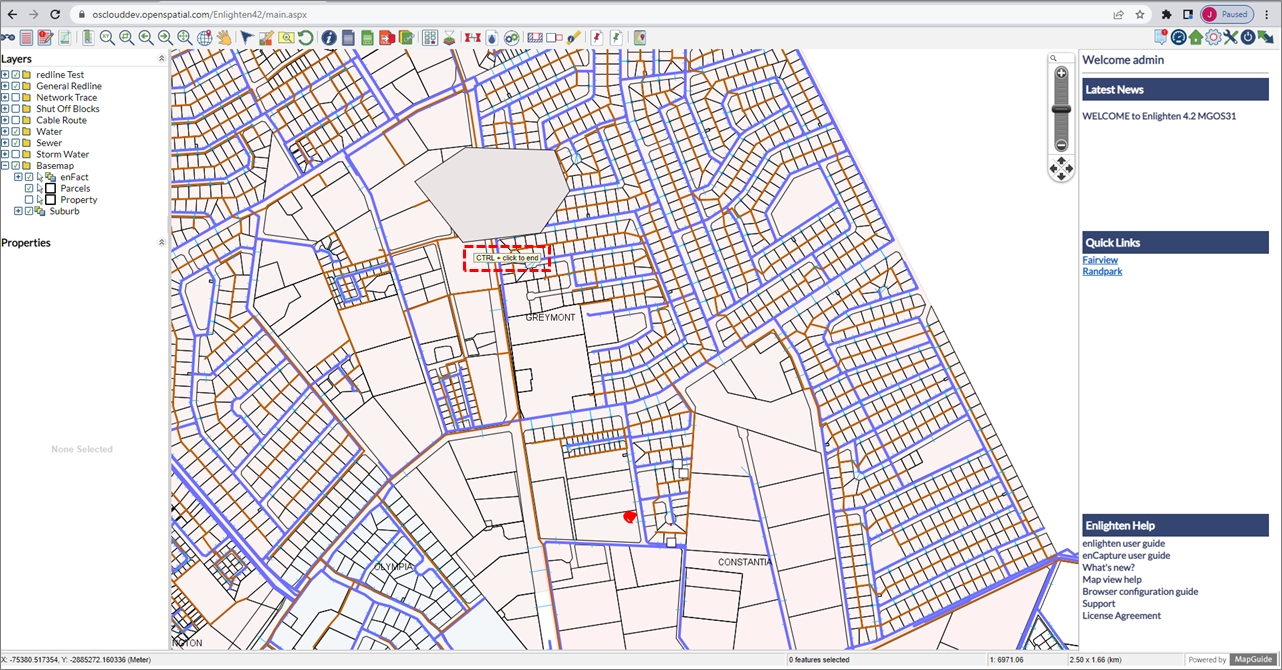
Fig: Context Menu Select Polygon
 Select Within
The Select Within command allows the user to select features within selected layers. By left clicking on select within tab, a working pane on the right-hand side of the screen will open allowing you to select one or more features (To select more than one feature hold the control key).
 KML Download
To download a KML file consisting of the map selections, the administrator should ensure that the relevant KML viewer is installed on the users workstation.
The user is first required to select the objects on the map that they wish to export to a .kml file, then right click on the map and select the Kml Download option from the context menu. Once clicked the user must select Click to Open link where the kml file will be downloaded to the users download folder.
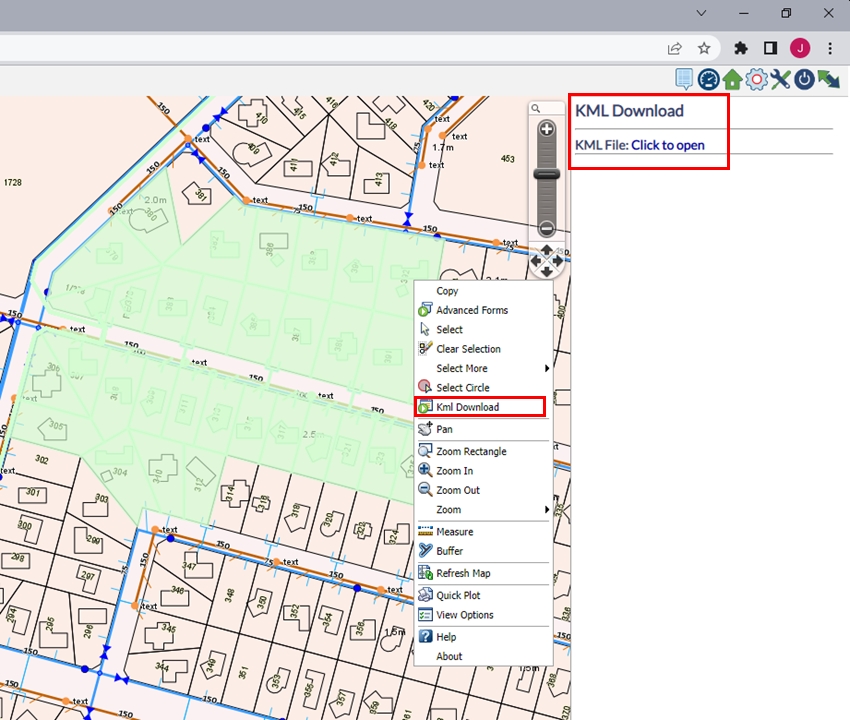
Fig: Kml Download - Click to Open option
On completion the downloaded file displays in the bottom left hand corner of the browser window. The file can then be saved in an appropriate location or opened directly in a KML viewer application.
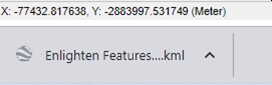
Fig: Kml Downloaded File
 Pan
Pan
The Pan command allows moving the map in a particular direction while the current scale is maintained. Click on the map with the left mouse button and drag the view in a chosen direction.
 Zoom Rectangle
The Zoom Rectangle command allows zooming in to a specific area on the map by drawing a box around it. Simply hold down the left mouse button and drag it to define the area of interest.
 Zoom In
The Zoom In command enables zooming into an area of the map by left-clicking once on the map window. The next view will be centered on the point where the mouse was placed.
 Zoom Out
The Zoom Out command enables zooming out of an area of the map by left-clicking once on the map window. The next view will be centered on the point where the mouse was placed.
More Zoom Commands
The Zoom option presents more zoom command options:
 Previous View
 Next View
 Initial Map View
 Initial Center and Scale
 Zoom Selection
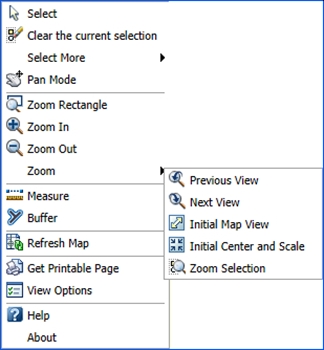
Fig: More Zoom Commands in the Context Menu
Previous View/Next View
The Previous View and Next View commands can be used once or multiple times to return to the previous views or to go to the one after the current view if one previous zoom has been made.
Initial Map View
The Initial Map View command zooms out to the extent which is specified in Mapguide Maestro. The map window will return to the default view, scale and settings as when first logged in but will maintain any additional layers such as buffers.
Initial Center and Scale
The Initial Center and Scale command zooms to the full extent of the data-set shown on the map.
Zoom Selection
The Zoom Selection command takes you straight to a selected feature or features. If you have zoomed out or panned away from the selected feature this tool re-centers the selected feature.
 Measure
The Measure tool acts like a distance tool or ruler by showing the distance between two or more selected points on the map. The measuring lines traced on the map are drawn on the layer Measure, where the Administrator can define the default settings. The Measure tool opens the Measure Distance pane on the right-hand side of the screen and shows the segment distance/s and total distance in the chosen units (see view options to change units).
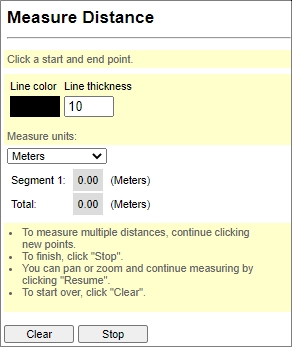
Fig: Measure Distance Pane
The Line color and Line thickness settings allow the user to customize the colour and transparency of the line traced on the map. When selecting to change the Line color, the user is presented with a Color Palette pick-box where the color can be selected from the Color palette, or can be set by entering RGB values, or by entering HEX values if the Hex format check-box is ticket. The Line Thickness can be adjusted by entering a numeric value into the text box (for example, 1 is a narrow line, and 10 is a thick line).
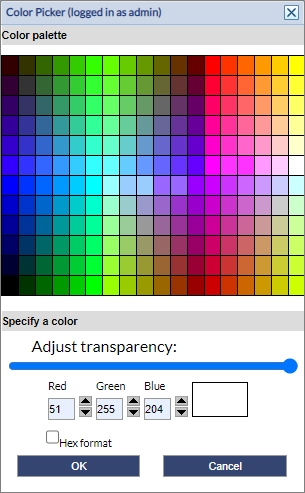
Fig: Measure Color Picker
To start measuring, click on the first point on the map, and thereafter on following points to measure multiple distances. The user can click the Stop button to stop measuring, or temporarily pause while using the pan/zoom functionalities to navigate around the map, and continue measuring by clicking on the Resume button. Once complete, the map re-loads and the traced measuring lines are displayed on the map using the selected color and thickness defined.
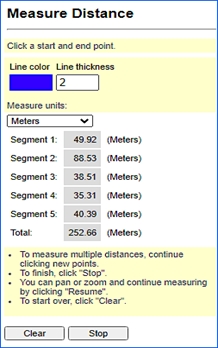
Fig: Measure Distance
When selecting the Clear button, the map reloads and the previously traced measurement lines are cleared from the map and the Measure Layer is switched off, while the Line colour and measurements are reset in the Measure Distance pane.
 Buffer
With this command, it is possible to create buffer zones around selected objects (i.e. valves, streets, and parcels).
To create a buffer around an object, please follow these steps:
- Select the object you wish to apply the buffer to (please refer to ‘select’ for instructions on how to select single and multiple objects).
- Right-click on the map window to access the Buffer command from the context menu.
- Enter the desired distance value and units in the pane on the right-hand side of the screen.
- Select the layer you would like the buffer to appear on.
- Type in a name for the buffer layer (i.e. 50m_manhole_buff).
- If you have selected more than one object, you may choose to merge the buffer of the area surrounding the two objects. Uncheck the box if you require separate selections.
- Select your desired fill style and colour and edge styles/colour.
- Select the desired transparency and line thickness.
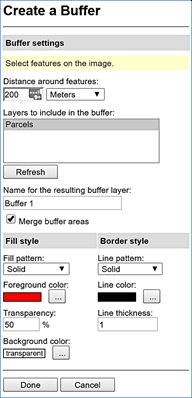
Fig: The Buffer Side Pane - Click Done to run the command.
A new layer containing buffer features will then be added to the Layer Control bar on the left.
- Results of the buffer are put into a new layer above the top feature layer.
- To create multiple buffer layers, use different buffer names.
- To hide buffer layers, turn them off.
- Buffer layers are temporary and are removed when you close the viewer.
To delete buffer features, select reload map.
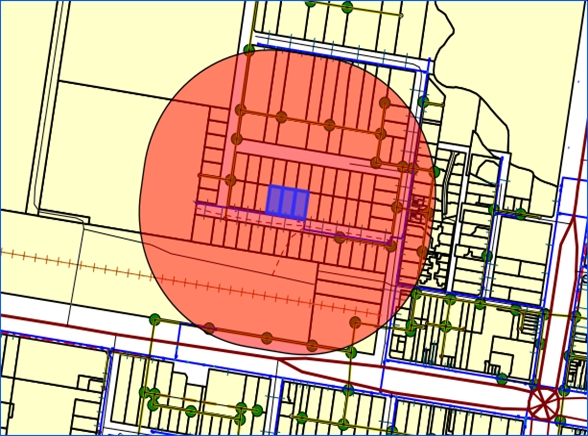
Fig: Buffer Layers
It is possible to generate several buffer layers and to switch them on/off like any other layer in the layer control bar. When generating a new buffer feature, it is possible to either name it as a new buffer layer or add it to existing layers.
To view the information about features selected with the Buffer tool:
- Select the buffer.
- Activate the Select more then Select Within option from the context menu (right-click in the map view) and choose a layer. For example, if the query is to find all the parcels that fall within the buffer, select the parcel layer from the Select Within dialog box. The parcel will be highlighted.
- Click on the ‘Advanced Form’ button to view the information and create reports.
 Refresh Map
Refreshes the map and reloads all layers, keeping the current center and scale. Refresh Map will not remove selections or layers.
 Quick Plot / Get Printable Page
The quick plot (Get Printable Page) function allows you to print a map of your current screen. A side pane opens on the right of the screen. In the side pane are options to insert a title and sub title. Advanced options can be checked to allow you to choose the paper size, scaling and print DPI. Once the selections have been made, click generate, this will give you a print preview in which you can print or cancel. When you select advanced options a grey box appears on the map which is a representation of the printable area that will be shown on the plot.
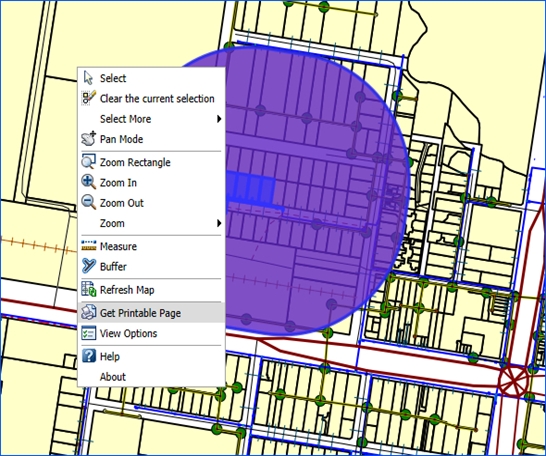
Fig: Get Printable Page
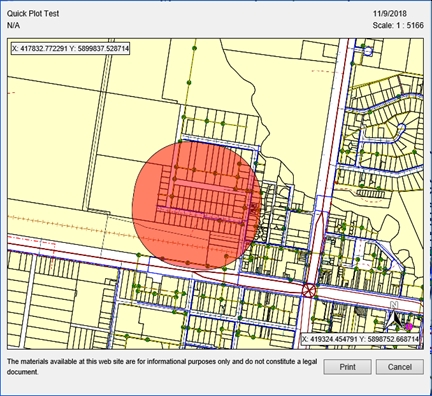
Fig: Quick Plot Preview
 View options
The view options tab in the right-click popup menu opens a pane on the right-hand side of the screen giving the user the option of metric or imperial measurements. Select your preferred units and hit the save button. The units can be changed at any time.
 Help
Help
The help tab takes the side pane on the right-hand side of your screen back to the home menu, giving you access to help options via the documentation hyperlinks including the user guide and administrators guide. The ‘Map view help’ link opens a new tab and provides a list of help for tools available on the right-click menu.
 About
About
The about option takes you to another window where you can view program properties and the licensing agreement.