Using Attributor
Attributor allows for the insertion (OSBLOCKINSERT) and editing (OSATTEDIT) of blocks through various methods, to suit users requirements. The insertion of blocks allows for the user to insert a block from the beginning and define the necessary parameters in line with the additional functionality and standardization which the Attributor allows for. In contrast the editing of blocks allows for the user to edit existing blocks and its parameters which were previously defined.
Upon the installation of Attributor, both configuration files can be found within C:\Program Files\Autodesk\ApplicationPlugins\Attributor.bundle\Application\Resources. If the configuration files are moved from this directory, then the system will notify the user that the specified file cannot be found as the search path may have not been defined for the new destination folder, therefore it is highly recommended to leave the configuration files in the default directory.
Inserting Blocks
Blocks can be inserted via the following methods:
-
Method 1:Attributor_Sample_Menu
-
Method 2: Ribbon Menu
-
Method 3: Command Line
Note: Mandatory fields are denoted by an asterisk (*) and are therefore required to be populated with the desired parameter.
Method 1: To Insert blocks via the Attributor_Sample_Menu:
Open Spatial have made a Sample Menu available which incorporates the blocks defined within the configuration files. These menu items invoke the OSBLOCKINSERT command and provide the necessary parameters of the layer to use (Layer 0 in this case), and the block name together with other mandatory insert block prompts eg. Insert of Screen, Scale X, Scale Y, Rotate).
To proceed with the insertion of blocks via the Attributor_Sample_Menu:
1. Navigate to, and click on the Attributor_Sample_Menu above the ribbon.

2. A list will appear, click on the block name to be inserted.
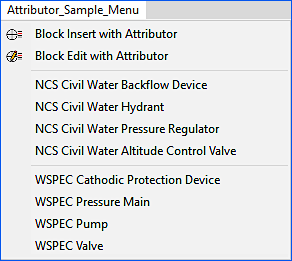
Note: The user will see the menu appear, in addition to the Block Insert with Attributor and Block Edit with Attributor icons, incorporated from the Ribbon.
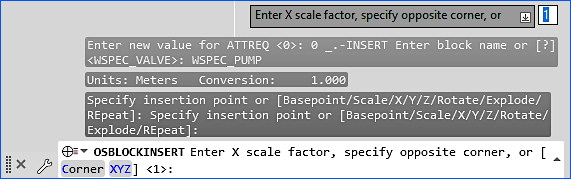
3. Specify the Insertion point.

4. Specify the X scale factor.
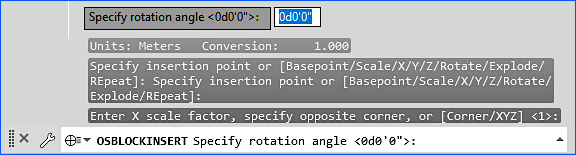
5. Specify the Rotation.
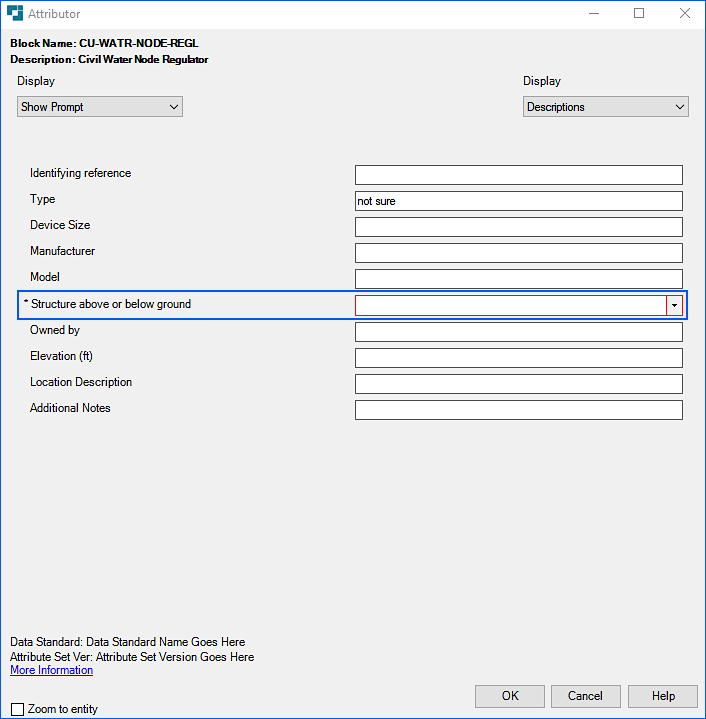
The Attributor dialog appears and the user can continue adding block attribute information.
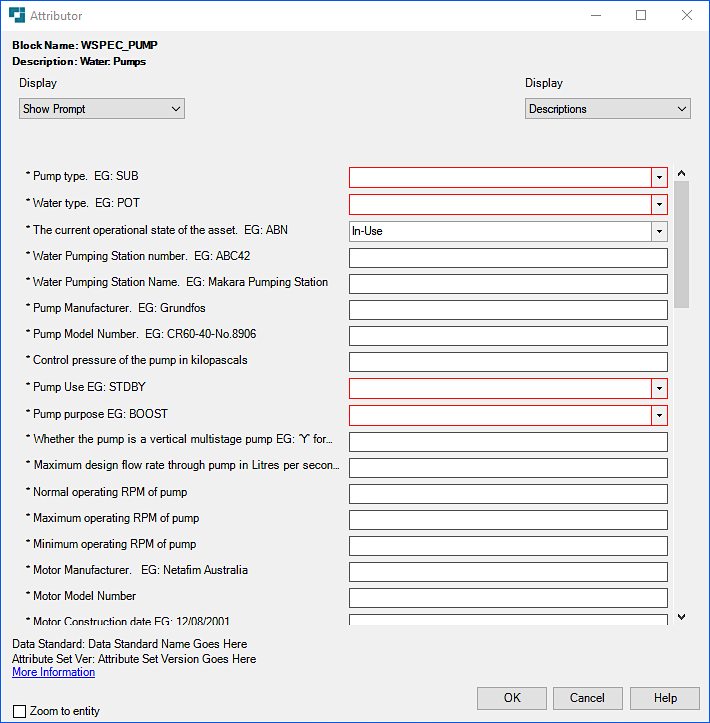
Note: Descriptions are truncated at 256 characters which is in line with the requirements as stipulated by AutoCAD.
6. When all the required information has been specified the user can click on OK to save the desired changes.
Method 2: To Insert blocks via the Ribbon Menu:
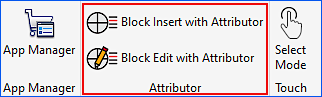
1. Navigate to the Ribbon > Add-ins > Block Insert with Attributor.
2. Type in the block name to be inserted.


Tip: The user can hit the tilde key (~) to pop up a browse window, where the user can navigate to the drawing to be opened. This can be useful for the user instead of typing in the physical name.
3. Specify the Insertion point.
4. Specify the X scale factor.
5. Specify the Rotation.
The Attributor dialog appears and the user can continue adding block attribute information.
Note: Descriptions are truncated at 256 characters which is in line with the requirements as stipulated by AutoCAD.
6. When all the required information has been specified the user can click on OK to save the desired changes.
Method 3: To Insert blocks via the Command Line:
1. Click on the Command Line at the bottom of AutoCAD.
2. Type in "OSBLOCKINSERT" thereafter hit ENTER.

3. Type in the block name to be inserted.
Tip: The user can hit the tilde key (~) to pop up a browse window, where the user can navigate to the drawing to be opened. This can be useful for the user instead of typing in the physical name.
4. Specify the Insertion point.
5. Specify the X scale factor.
6. Specify the Rotation.
The Attributor dialog appears and the user can continue adding block attribute information.
Note: Descriptions are truncated at 256 characters which is in line with the requirements as stipulated by AutoCAD.
7. When all the required information has been specified the user can click on OK to save the desired changes.
Editing Blocks
As with the Insertion of blocks, there are 3 methods which cater for the editing of blocks and simultaneously allowing the user the opportunity to utilize the preferred choice. The 3 methods are:
-
Method 1:Attributor_Sample_Menu
-
Method 2: Ribbon Menu
-
Method 3: Command Line
When editing a block, invoke the command using any of the 3 methods, select the block on the screen. The Attributor dialog will display, and you can edit the block attribute tag values in the same way as when the block was first inserted.
When Attributor is used to edit an existing block in the drawing, checks are run on the tag values when the block is opened to confirm the values are valid as per the definitions listed in the Attributor configuration files. Specifically, values are checked against the configured domain lists for compliance. If a tag value is incorrect when a block is opened for edit, Attributor will flag the error using a red outline around the dropdown list as shown below.